Google Forms is a powerful tool for creating surveys, quizzes, feedback forms, and more. Its simplicity and versatility make it a popular choice for both personal and professional use. However, to get the most out of Google Forms, it’s essential to know how to make changes and customize your forms to suit your specific needs. This comprehensive guide will walk you through the various ways to modify Google Forms, including editing questions, customizing themes, managing responses, and more.
Introduction to Google Forms
Google Forms is part of the Google Workspace suite of applications. It allows users to create and share online forms easily. You can use it to gather data, conduct surveys, collect feedback, and much more. Google Forms integrates seamlessly with other Google services like Google Sheets and Google Drive, making data management efficient and straightforward.
Accessing Google Forms

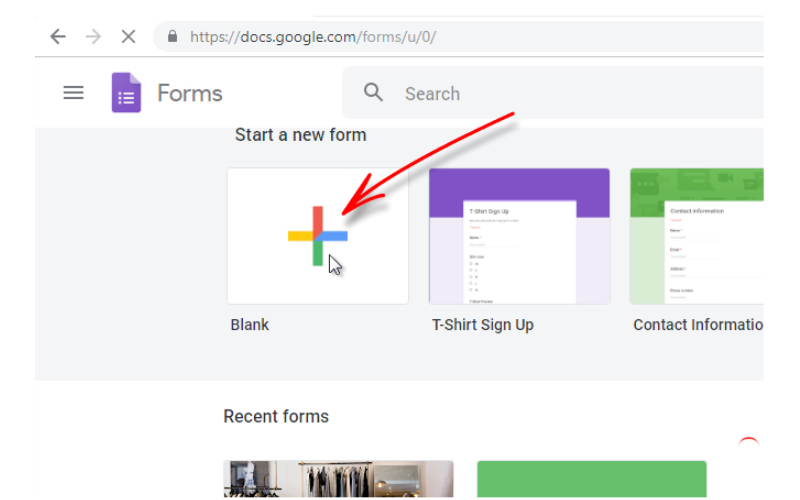
To access Google Forms, follow these steps:
- Open Your Browser: Use any web browser and go to Google Forms.
- Sign In: Sign in with your Google account. If you don’t have one, you’ll need to create a Google account.
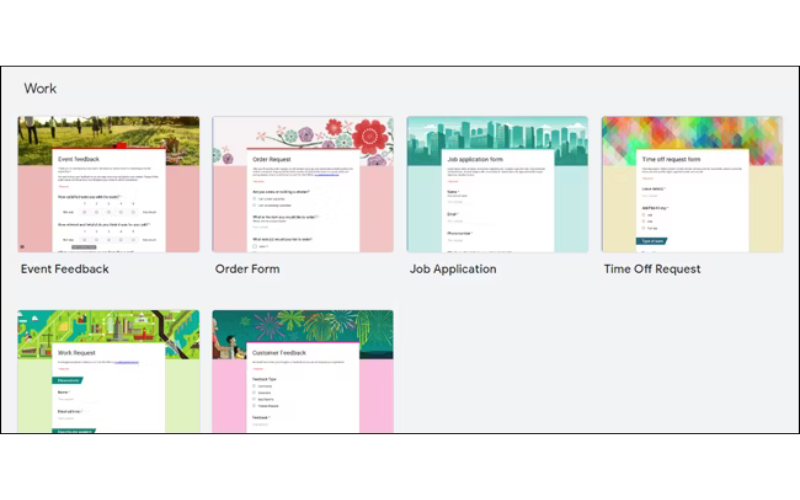
- Create a New Form: Click on the “Blank” form to start from scratch or choose from one of the templates available.
Making Changes to Google Forms
1. Editing Questions
Once you’ve created a form, you can add, edit, or delete questions as needed.
Adding Questions
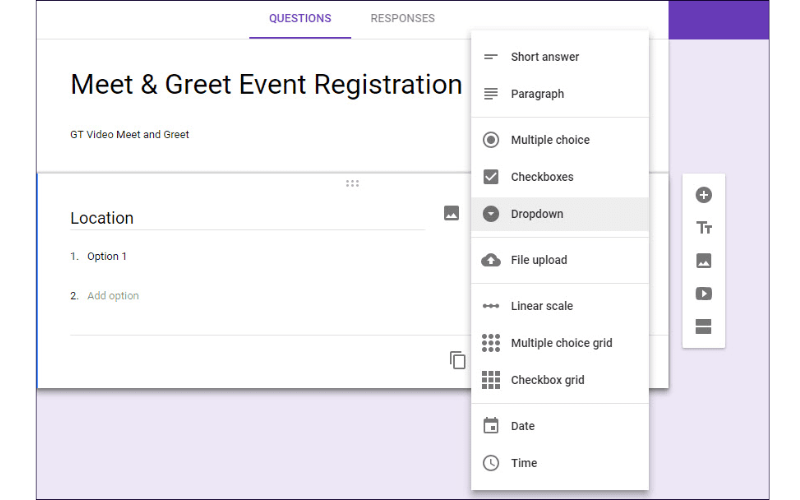
- Click the Plus Icon (+): This icon is located on the right-hand side toolbar.
- Choose Question Type: Google Forms offers various question types, including multiple choice, checkboxes, short answer, paragraph, and more. Select the type that best suits your needs.
- Enter Your Question: Type your question in the “Question” field.
- Add Options: For question types like multiple choice or checkboxes, enter the options in the provided fields.
Editing Questions
- Click on the Question: To edit an existing question, simply click on it.
- Make Changes: Modify the question text, options, or question type as needed.
- Reorder Questions: Use the drag-and-drop handle on the left side of each question to reorder them.
Deleting Questions
- Select the Question: Click on the question you want to delete.
- Click the Trash Can Icon: This icon is located at the bottom of the question box.
2. Customizing Themes
Google Forms allows you to customize the appearance of your form to make it visually appealing.
Changing the Theme
- Click the Palette Icon: Located at the top right corner of the form.
- Choose a Theme: Select from the pre-set themes available or click on “Choose image” to upload a custom header image.
- Customize Colors: You can also change the background color and font style to match your preferences.
3. Adding Sections
Adding sections can help organize your form into different parts, making it easier for respondents to navigate.
- Click the Add Section Icon: This icon looks like two rectangles stacked on top of each other and is located on the right-hand side toolbar.
- Name Your Section: Enter a title and description for the new section.
4. Managing Responses
Google Forms offers several ways to manage and analyze the responses you receive.
Viewing Responses
- Go to the Responses Tab: Click on the “Responses” tab at the top of your form.
- Summary of Responses: View a summary of all responses, including graphs and charts for multiple-choice questions.
- Individual Responses: Click on “Individual” to view each response separately.
Exporting Responses
- Click the Green Sheets Icon: This icon allows you to export responses to Google Sheets for further analysis.
- Download Responses: You can also download responses as a CSV file by clicking the three-dot menu and selecting “Download responses (.csv).”
5. Adding Logic to Forms
Logic features like skip logic and conditional branching can enhance the functionality of your form.
Adding Skip Logic
- Select a Question: Choose a question that will determine the skip logic.
- Click the Three-Dot Menu: Located at the bottom right of the question box.
- Go to Section Based on Answer: Select this option to create skip logic.
- Set Up Rules: Define which section respondents should go to based on their answers.
6. Enabling Quiz Features
Google Forms allows you to turn your form into a quiz with point values, automatic grading, and feedback.
- Go to Settings: Click on the gear icon at the top right corner of the form.
- Select Quizzes: Toggle on the “Make this a quiz” option.
- Assign Points: For each question, assign point values and correct answers.
- Provide Feedback: Add feedback for correct and incorrect answers if desired.
7. Collaborating on Forms
You can collaborate with others on your form by sharing editing access.
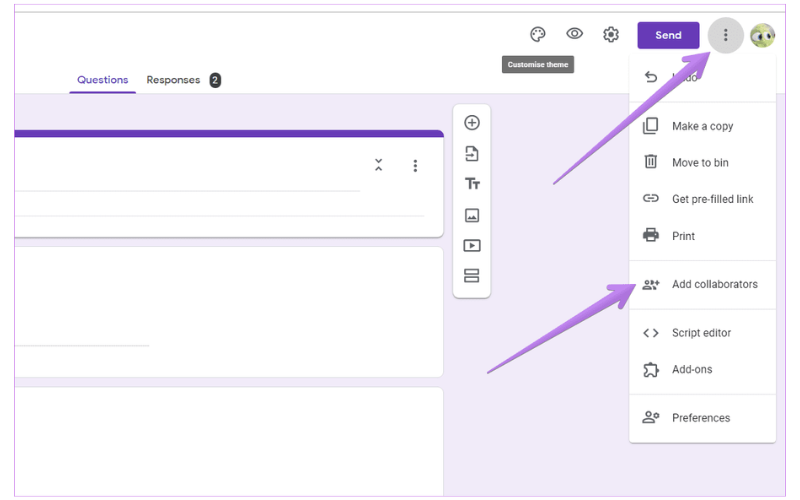
- Click the Three-Dot Menu: Located at the top right corner.
- Select Add Collaborators: Enter the email addresses of the people you want to share the form with.
- Set Permissions: Choose whether they can edit the form or just view it.
8. Setting Up Notifications
To stay informed about new responses, you can set up email notifications.
- Go to the Responses Tab: Click on the “Responses” tab.
- Click the Three-Dot Menu: Select “Get email notifications for new responses.”
Frequently Asked Questions (FAQs)
1. How do I share my Google Form?
To share your Google Form, click the “Send” button at the top right corner of the form. You can share the form via email, link, or embed it in a website.
2. Can I limit the number of responses to my Google Form?
Yes, you can limit responses. Go to the “Responses” tab, click the three-dot menu, and select “Limit to 1 response.” This requires respondents to sign in to Google.
3. How can I duplicate a Google Form?
To duplicate a form, open the form, click the three-dot menu at the top right, and select “Make a copy.” Rename the copy and save it to your desired location.
4. Can I print a Google Form?
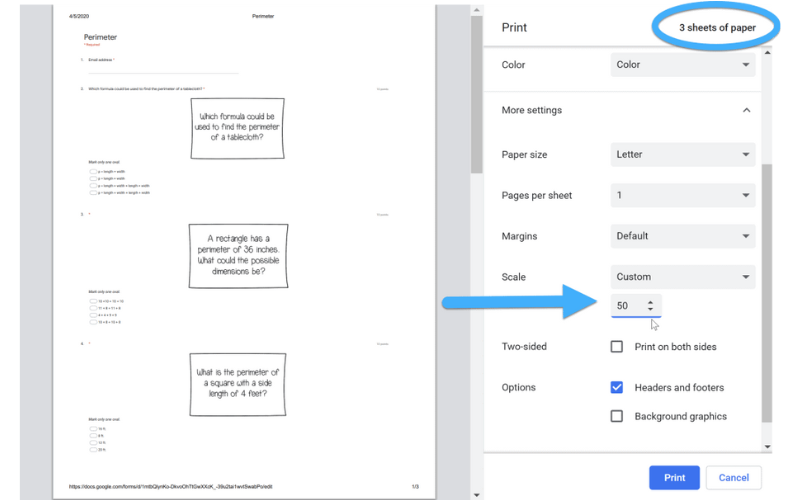
Yes, you can print a Google Form. Click the three-dot menu and select “Print.” This will generate a printable version of the form.
5. How do I delete a Google Form?
To delete a Google Form, go to your Google Drive, find the form, right-click on it, and select “Remove.” The form will be moved to the trash.
6. Can I add images or videos to my Google Form?
Yes, you can add images or videos to your form. Click the image or video icon on the right-hand side toolbar, then upload or link to the desired media.
7. How do I make my Google Form anonymous?
To make your form anonymous, do not ask for identifying information and ensure that “Collect email addresses” is turned off in the settings.
8. Can I create a time-limited Google Form?
While Google Forms doesn’t have a built-in timer feature, you can use add-ons like “FormLimiter” to close the form at a specific time.
9. How do I reorder questions in Google Forms?
To reorder questions, click and hold the six-dot handle on the left side of the question, then drag it to the desired position.
10. How do I embed a Google Form on a website?
To embed a Google Form, click the “Send” button, select the embed icon (< >), copy the embed code, and paste it into your website’s HTML.
Conclusion
Google Forms is a versatile and user-friendly tool that can be customized in numerous ways to meet your needs. By following this comprehensive guide, you can effectively create, edit, and manage your Google Forms, ensuring they serve their intended purpose. Whether you’re conducting a survey, collecting feedback, or creating a quiz, understanding how to make changes in Google Forms will help you maximize its potential and achieve your goals.